Recent Posts
9 Best Quartz Banger Upgrades Under $20 in 2026 (Kits, Slurpers & More)
Published on January 09, 2026
How to Turn a Bong Into a Dab Rig (And Vice Versa)
Published on December 23, 2025
Quartz Banger vs. Traditional Dab Nail: Which Should You Buy?
Published on November 22, 2025
The Ultimate Thanksgiving & Friendsgiving Gift Guide: Perfect Picks for Every Budget
Published on November 12, 2025
Cyber Monday Steals: Top Bongs, Dab Rigs, and Oil Burners for the Best Value
Published on November 12, 2025
The Ultimate Black Friday Stocking Stuffer Guide (Awesome Gifts Under $30)
Published on November 12, 2025
How To Roll A Filter For A Joint?
CP SMOKE MEGA |
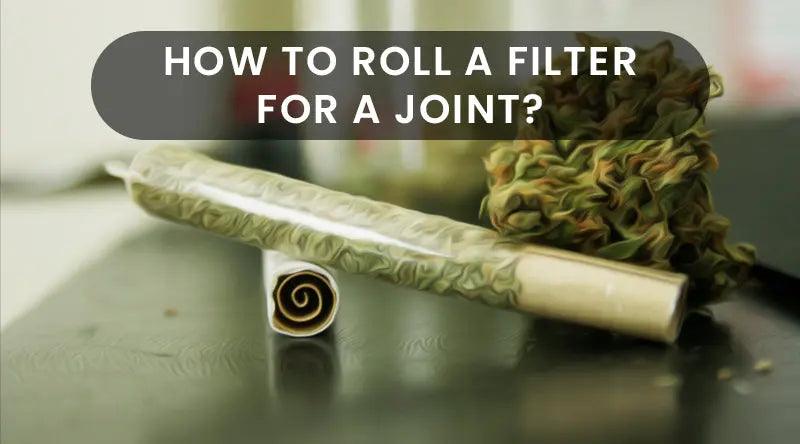
Rolling a filter for a joint is relatively easy, and it all starts with choosing the right materials. Traditionally, filters are made from cardboard or thick paper. They help to prevent small pieces of cannabis from entering your mouth when inhaling, and they also act as a sturdy base for your joint, making it easier to hold and smoke. By rolling a filter, you're not only adding to the structural integrity of your joint, but you're also contributing to a more enjoyable smoking experience.
To Roll A Filter For A Joint, Follow These Steps:
Before we delve into the step-by-step process of rolling a filter for a joint, let's understand why it's essential to use a filter in the first place. A filter, also known as a crutch or tip, serves multiple purposes when smoking a joint. Firstly, it provides structural support, preventing the joint from collapsing or becoming too loose. Secondly, it acts as a barrier, preventing small bits of herb from being inhaled. Lastly, it serves as a handle, allowing for a better grip while smoking.

Step 1: Gather Your Materials
Before you start rolling a filter, make sure you have all the necessary materials. You will need:
- Cardstock, business card, or pre-cut filter tips
- Scissors
- A flat, clean surface
- Your preferred rolling paper
- Dry herb of your choice
Step 2: Prepare the Filter Material
If you're using cardstock or business cards, begin by cutting a strip that is approximately 1 inch wide and 2-3 inches long. If you have pre-cut filter tips, you can skip this step. Make sure to use clean scissors to avoid any contamination.
Once you have the strip of cardstock or business card, fold it accordion-style, making small folds back and forth until you reach the end. This will create a zigzag pattern within the filter.
If you prefer a cylindrical filter, you can skip the folding step and roll the strip tightly to form a cylinder.

Step 3: Position the Filter in the Rolling Paper
Take your rolling paper and position it with the adhesive strip away from you. Place the filter at one end of the paper, ensuring that it is centered and aligned with the edge.
Pro tip: If you're using a cylindrical filter, position it closer to one end, leaving space for the herb to be evenly spread throughout the joint.
Depending on your preference, you can roll the filter to be a tight cylinder, a cone shape, or a flat mouthpiece. Experiment with different techniques to find your desired smoking experience.
Step 4: Add the Herb and Roll the Joint
Now that the filter is in place, it's time to add the dry herb. Take a pinch or two of your chosen herb and evenly distribute it along the length of the rolling paper, ensuring that it covers the area next to the filter.
Once the herb is in place, use your thumbs and forefingers to begin rolling the paper back and forth, sealing the joint and compressing the herb. Apply light pressure but be careful not to tear the paper or dislodge the filter.
Continue rolling until the entire paper is tightly wrapped around the herb. Use a lick or adhesive strip to seal the joint, ensuring it stays securely closed.

Step 5: Final Touches and Enjoyment
With the joint rolled and sealed, it's time for some final touches. Use your fingers or a small tool to gently pack the herb down, ensuring an even burn and preventing any loose material from falling out.
Once you're satisfied with the pack, twist the open end of the joint to keep it closed and tidy. You can also use a lighter to gently heat the twisted end, making it easier to light later.
Now, all that's left is to find a comfortable spot, light up, and enjoy your well-rolled joint with a perfectly crafted filter. Remember to smoke responsibly and in accordance with applicable laws and regulations.
Rolling a filter for a joint may seem like a simple task, but it can greatly enhance your smoking experience. By following these step-by-step instructions, you'll be able to create a joint with a sturdy filter that improves the overall quality of your session. Happy rolling!
Key Takeaways:
- A filter for a joint helps improve airflow and keeps debris out.
- Start by cutting a strip from a business card or index card.
- Accordion fold the strip back and forth until it's about the width of the joint.
- Roll the strip tightly and insert it into the end of the joint.
- Use a pen or something similar to pack the filter down and secure it in place.

Frequently Asked Questions
Rolling a filter for a joint can enhance your smoking experience by providing a smoother draw and preventing loose herb from entering your mouth. Here are some commonly asked questions about rolling a filter for a joint:
Why should I roll a filter for my joint?
Rolling a filter for your joint offers several benefits. Firstly, it helps to prevent loose herb from entering your mouth, making your smoking experience more enjoyable. It also provides stability to the joint, allowing for easier handling. Additionally, using a filter can result in a smoother draw, reducing the harshness of the smoke.
What materials can I use to make a joint filter?
There are various materials you can use to make a joint filter. The most common options include pre-made filter tips, business cards, index cards, and cardboard from packaging materials. It's important to choose a material that is sturdy enough to hold its shape without disintegrating when in contact with moisture.
How do I roll a filter for a joint?
To roll a filter for a joint, start by cutting your desired filter material into a rectangular shape. Fold one end of the material accordion-style, making small folds until you reach the desired thickness. Roll the folded end tightly and secure it with your fingers. Finally, twist the remaining unfolded portion of the filter material to create a firm base. Insert the filter into your joint, and you're ready to roll!
Can I reuse a joint filter?
In most cases, joint filters are designed for single-use and can become clogged or damaged after one session. However, some reusable filter options, such as glass tips, are available on the market. These can be easily cleaned and reused multiple times.
Are there any alternatives to rolling a filter for a joint?
If you don't have access to filter materials or prefer not to use a filter, there are alternative methods to enhance your smoking experience. One option is to create a "crutch" by rolling a small piece of paper or cardboard and placing it at the end of your joint. This can help prevent herb from entering your mouth while still providing some stability.
Conclusion:
In conclusion, rolling a filter for a joint is a simple and important step in achieving a smoother smoking experience.
By following the steps outlined in this article, you can easily create a filter using materials like cardboard or pre-made filter tips. Remember to keep the filter tight and secure so that it doesn't fall apart during the rolling process. Once you've mastered this technique, you'll be able to enjoy a joint with a built-in filter that helps prevent the inhalation of unwanted particles and delivers a more enjoyable smoking experience.


