Recent Posts
Can You Use A Bong As A Dab Rig?
Published on May 13, 2025
Can You Use A Hookah Like Bong-Learn In Details
Published on May 12, 2025
How to Fill a Double Perc Bong the Right Way for Smooth Hits
Published on May 12, 2025
Can you use acetone to clean a bong?
Published on May 10, 2025
Which Is Better – Bong or Joint? Let's Learn In Details
Published on May 09, 2025
Are bong hits stronger than joints - Let's Find Out Reality
Published on May 07, 2025
9 Steps - How To Clean A Nectar Collector

CP SMOKE MEGA |
Cleaning your nectar collector is not just a chore; it's a crucial step in ensuring a smooth and enjoyable smoking experience. Neglecting this process can lead to a compromised taste and even health hazards. In this comprehensive guide, we'll walk you through the 9 Easy Steps to Clean A Nectar Collector, providing expert insights and valuable tips.
What is a Nectar Collector?
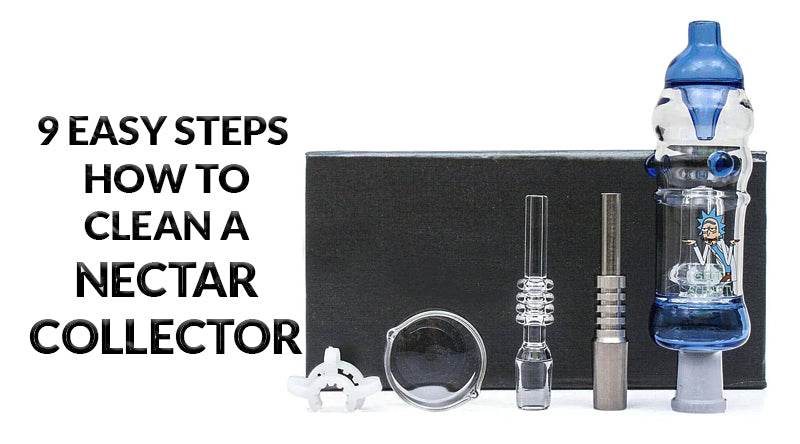
Before delving into the cleaning process, let's understand what a nectar collector is. This unique smoking tool allows for a more controlled and efficient dabbing experience. It typically consists of a straw-like tube, a percolator, and a mouthpiece.

Here Are Easy 9 Steps - How To Clean A Nectar Collector
Step 1: Disassembly
Disassembling your nectar collector is the crucial first step towards ensuring a thorough and effective cleaning process. Each component plays a significant role in delivering a pure and flavorful smoking experience, so taking the time to disassemble the device is essential.
Prepare Your Workspace:
Before you start, find a clean and well-lit area to work in. Having a designated space ensures that you won't lose any tiny parts during disassembly.
Gently Remove the Mouthpiece:
Begin by carefully removing the mouthpiece. This part is often detachable and should come off with a gentle twist or pull. Set it aside for individual cleaning.
Unscrew the Percolator:
If your nectar collector has a percolator, unscrew it from the main body. This step allows you to access the intricate parts of the percolation system for thorough cleaning.
Separate Other Detachable Parts:
Identify any other detachable parts, such as the straw-like tube or any additional chambers. Remove these components carefully, ensuring you remember their order for easy reassembly.
Inspect for Any Hidden Components:
Some nectar collectors may have hidden or unscrewable components. Take a moment to inspect the device thoroughly. Look for any hidden chambers or compartments that may require disassembly.
Take Note of O-Rings and Seals:
If your nectar collector has O-rings or seals, be mindful of them during disassembly. These components are crucial for maintaining airtight connections and preventing leaks.
Arrange Components in Order:
As you disassemble, arrange the components in the order you remove them. This organization will make the reassembly process smoother, ensuring each part finds its place effortlessly.
Handle with Care:
Treat each component with care to avoid accidental breakage or damage. Nectar collectors are precision devices, and gentle handling ensures they remain in optimal condition.
After successfully disassembling your nectar collector, the next vital step is the initial rinse. This step sets the foundation for a comprehensive cleaning process, removing loose debris and preparing the components for more detailed cleaning.
Step 2: Initial Rinse
Use Warm Water:
Begin by rinsing each disassembled part under warm water. The warmth helps to loosen and remove any surface residue or particles.
Thoroughly Rinse Each Component:
Hold each part individually under the running water, ensuring you cover every nook and cranny. Pay special attention to areas where concentrates may accumulate.
Remove Loose Debris:
Gently shake or tap each component to dislodge any loose debris. This step is crucial for eliminating easily removable particles before moving on to more intensive cleaning methods.
Inspect for Lingering Residue:
As you rinse, visually inspect each part. Look for any stubborn residue that may require additional cleaning steps. Identifying and addressing residue early ensures a more effective cleaning process.
Pat Dry with a Clean Cloth:
After the initial rinse, pat each component dry with a clean cloth. While this step doesn't complete the cleaning process, it helps remove excess water and prepares the parts for the subsequent soaking and scrubbing stages.

Step 3: Soaking
The soaking stage is a pivotal step in deep-cleaning your nectar collector, effectively breaking down stubborn residue and ensuring a pristine smoking experience.
Choose Isopropyl Alcohol:
Opt for high-percentage isopropyl alcohol as your soaking solution. This powerful solvent is effective in dissolving sticky residues.
Submerge Components:
Immerse the disassembled nectar collector components in a container filled with isopropyl alcohol. Ensure that each part is fully submerged for optimal results.
Follow Recommended Time:
Allow the components to soak for the recommended time, typically around 30 minutes to an hour. This duration ensures the alcohol thoroughly breaks down any accumulated residue.
Occasional Agitation:
During the soaking period, gently agitate the container or give it a slight shake. This helps the alcohol reach all surfaces and enhances its cleaning effectiveness.
Use a Sealable Container:
If possible, use a sealable container for soaking. This prevents evaporation and allows for a more concentrated cleaning solution throughout the process.
Prepare for Scrubbing:
While the components soak, prepare your cleaning tools, such as brushes or cotton swabs. These will be essential for the next step of the cleaning process.
Soaking sets the stage for thorough cleaning by softening hardened residues. This method is especially effective for intricate parts, ensuring every nook and cranny is ready for the scrubbing process that follows.
Step 4: Scrubbing
With your nectar collector components thoroughly soaked, the next step is crucial: scrubbing. This hands-on approach ensures the removal of any remaining residue and guarantees a pristine device for your next smoking session.
![]()
Select Appropriate Tools:
Equip yourself with brushes, cotton swabs, or pipe cleaners. The choice of tools depends on the size and intricacy of the parts you're scrubbing.
Focus on Residue-Prone Areas:
Identify areas with stubborn residue, focusing on spots where concentrates commonly accumulate. Scrub these areas with precision to ensure a thorough cleaning.
Gentle yet Firm Scrubbing:
While it's important to be thorough, maintain a balance between gentleness and firmness during the scrubbing process. Avoid using excessive force that could damage the delicate components.
Use Cleaning Solutions as Needed:
If residue persists, dip your cleaning tools in isopropyl alcohol or a cleaning solution recommended for nectar collectors. This enhances the scrubbing process and ensures a more effective clean.
Reach Hidden Crevices:
Pay special attention to hidden or hard-to-reach crevices. Utilize the tip of a cotton swab or a small brush to access these areas, leaving no part untouched.
Inspect for Residue Removal:
Regularly inspect the components as you scrub to ensure residue removal. A clean, residue-free surface is the goal at this stage.
Repeat if Necessary:
If certain areas prove challenging, don't hesitate to repeat the scrubbing process. Patience and diligence lead to a more thorough clean.
Rinse After Scrubbing:
After completing the scrubbing process, rinse each component under warm water. This washes away dislodged residue and prepares the nectar collector for the next steps in the cleaning journey.
Effective scrubbing is the key to achieving a spotless nectar collector. By investing time and attention into this step, you ensure that your device is not only clean but also ready to deliver the purest smoking experience.

Step 5: Cleaning the Perc
Unlock the heart of your nectar collector with Step 5: Cleaning the Perc. This crucial stage involves using a specialized percolator brush to meticulously cleanse the intricate percolation system. Ensuring the percolator is spotless guarantees optimal filtration, preserving the purity of your concentrates. Dive into this detailed process to experience a smoking device that not only looks pristine but also enhances every dab. Elevate your smoking journey with a meticulously cleaned percolator, allowing you to savor the full flavor profile of your favorite concentrates.
Step 6: Cleaning the Mouthpiece
Step into the realm of meticulous hygiene with Step 6: Cleaning the Mouthpiece. This crucial stage involves using a pipe cleaner to reach every crevice, ensuring a hygienic and flavorful smoking experience. Delve into the details, making certain that every inch of the mouthpiece is free from residue. By adopting this meticulous approach, you not only maintain cleanliness but also enhance the purity of each inhale. Elevate your smoking ritual by investing time in the detailed cleaning of the mouthpiece, unlocking a world of unadulterated and satisfying dabbing sessions.
Step 7: Final Rinse
Embark on the concluding phase of nectar collector rejuvenation with Step 7: Final Rinse. After meticulous disassembly, soaking, and scrubbing, treat each component to a refreshing rinse under warm water. This final cleanse ensures the removal of any lingering cleaning solutions and guarantees a residue-free device. With a focus on thoroughness, the final rinse is your assurance of a spotless nectar collector, setting the stage for the ultimate smoking experience. Immerse your components, let the water flow, and witness the transformation as your device emerges, ready to deliver pure, unadulterated flavor with every use.
Step 8: Drying
Transition seamlessly to the drying phase with Step 8: Drying. After the cleansing journey, ensure each nectar collector component is air-dried thoroughly. This critical step prevents mold and bacteria growth, preserving the integrity of your device. Patiently await the dryness that signals your components are ready for reassembly. By adhering to proper drying practices, you not only extend the lifespan of your nectar collector but also safeguard against potential health hazards. Embrace the waiting game, knowing that each moment contributes to a meticulously dried device, primed for the next flavorful session.
Step 9: Reassembly
In the final act of nectar collector care, Step 9: Reassembly brings together the meticulously cleaned components. With each part now pristine and dry, follow a step-by-step guide to reassemble your device. Take your time, ensuring a snug fit for every piece. As the nectar collector comes back to life, appreciate the fruits of your cleaning efforts. The reassembly not only signifies the conclusion of the cleaning journey but also sets the stage for a fresh, pure, and enjoyable smoking experience. Celebrate the reunion of components, ready to deliver optimal performance with every dab.

Common Mistakes to Avoid
- Avoid using abrasive materials that may damage the nectar collector.
- Don't rush the drying process; thorough drying is crucial.
Benefits of Regular Cleaning:
Regular cleaning not only enhances the flavor of your concentrates but also prolongs the lifespan of your nectar collector. A clean device ensures a pure and enjoyable smoking experience.
Troubleshooting Tips
- If residue persists, repeat the soaking and scrubbing steps.
- Check for clogs in the percolator; a clean percolator guarantees optimal filtration.
Expert Tips and Tricks
- Store your nectar collector in a protective case to prevent dust and debris accumulation.
- Clean your nectar collector after every use for optimal results.
Safety Precautions:
- Always clean your nectar collector in a well-ventilated area.
- Use gloves when handling isopropyl alcohol to avoid skin irritation.
Conclusion:
In conclusion, mastering the art of cleaning your nectar collector is key to a consistently enjoyable smoking experience. Follow these 9 Easy Steps diligently, and you'll not only enhance the flavor of your concentrates but also extend the life of your beloved nectar collector.


