Recent Posts
Quartz Banger vs. Traditional Dab Nail: Which Should You Buy?
Published on November 22, 2025
The Ultimate Thanksgiving & Friendsgiving Gift Guide: Perfect Picks for Every Budget
Published on November 12, 2025
Cyber Monday Steals: Top Bongs, Dab Rigs, and Oil Burners for the Best Value
Published on November 12, 2025
The Ultimate Black Friday Stocking Stuffer Guide (Awesome Gifts Under $30)
Published on November 12, 2025
Your Go-To Online Smoke Shop: Discover Top Bongs & Dab Rigs for Effortless Hits
Published on October 03, 2025
Top 3 Nectar Collectors For Sale In The USA
Published on July 20, 2025
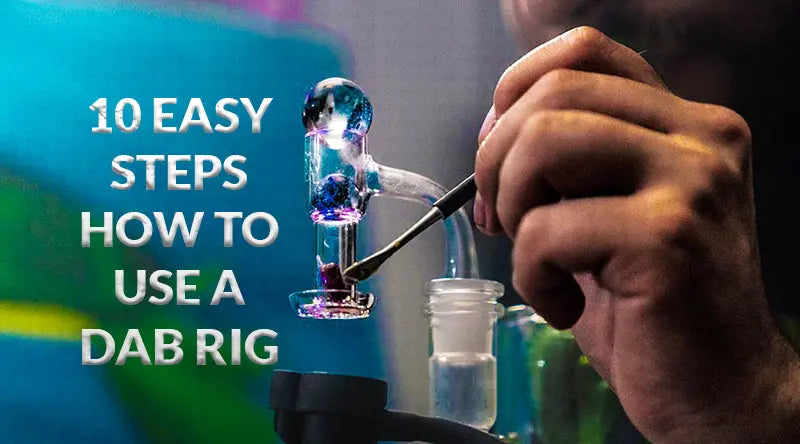
10 Easy Steps - How To Use A Dab Rig
CP SMOKE MEGA |
Dabbing has become an increasingly popular method for consuming concentrates, offering a potent and flavorful experience. If you're new to the world of dabbing, fear not! In this comprehensive guide, we'll take you through the 10 easy steps on how to use a dab rig, ensuring you get the most out of your concentrates without any hassle.
What Is a Dab Rig?
A dab rig is a type of water pipe specifically designed for vaporizing and inhaling cannabis concentrates. It consists of various components that work together to deliver a smooth and potent dabbing experience.

Here are 10 Easy Steps: How To Use A Dab Rig?
Step 1: Understanding the Basics
Components of a Dab Rig
Dab rigs typically consist of a dab nail, dome, and torch. Each component plays a crucial role in ensuring the proper vaporization of concentrates.
1. Dab Nail or Banger
The dab nail or Banger(modern version) is the part of the rig where you place your concentrate. It's usually made of quartz, ceramic, or titanium, each material offering a different dabbing experience.
2. Dome
The dome is a cover placed over the dab nail to trap the vapor, allowing for a more controlled inhalation.
3. Torch
A torch is used to heat the dab nail. It's essential to heat the nail to the right temperature for optimal vaporization.
Step 2: Choosing the Right Dab Rig
Types of Dab Rigs
There are various types of dab rigs available, but the most common ones are traditional glass rigs and electronic rigs (e-rigs). Understanding the differences will help you make an informed choice.
1. Traditional Glass Rigs
Traditional glass rigs offer a classic dabbing experience, often favored by seasoned users for their simplicity and aesthetic appeal.
2. E-Rigs
Electronic rigs, or e-rigs, are powered by electricity and provide a convenient and portable dabbing solution. They are ideal for users who prioritize ease of use and portability.
Step 3: Setting Up Your Dab Rig
Setting up your dab rig is a crucial step to ensure a smooth and enjoyable dabbing experience. In this section, we'll guide you through the necessary tasks for proper rig assembly and maintenance.
Cleaning and Maintenance
Proper cleaning and maintenance are crucial for the longevity of your dab rig. Regularly clean the components with isopropyl alcohol to prevent residue buildup.

Gather Cleaning Supplies: Assemble isopropyl alcohol, cotton swabs, and pipe cleaners. These items will help you clean the various components of your dab rig effectively.
Empty the Water Chamber: Start by emptying the water chamber of your dab rig. Dispose of the used water and rinse the chamber with warm water to remove any remaining residue.
Clean the Dab Nail: Use a cotton swab soaked in isopropyl alcohol to clean the dab nail. Remove any stubborn residue by gently scrubbing the surface. Ensure the nail is completely dry before use.
Assembling the Rig Properly
Once your dab rig is clean, it's time to assemble it properly. Follow these steps to ensure a secure and effective setup.
Refer to Manufacturer's Instructions: Consult the manufacturer's instructions for your specific dab rig model. Different rigs may have unique assembly steps, so it's essential to follow the provided guidelines.
Secure Connections: Ensure that all connections, including the downstem and mouthpiece, are securely in place. Loose connections can lead to leaks or malfunctions.
Place the Dab Nail: If your rig has a removable dab nail, place it securely in the designated slot. Ensure it sits evenly and does not wobble.
Attach the Dome (if applicable): If your dab rig includes a dome, carefully attach it over the dab nail. Make sure it fits snugly to contain the vapor during the dabbing process.
Position the Rig: Place your dab rig on a stable surface. Avoid precarious locations to prevent accidental tipping during use.
By following these steps, you'll set up your dab rig for optimal performance and ensure a clean, flavorful dabbing experience. Regular maintenance will prolong the life of your rig and contribute to a more enjoyable session every time.

Step 4: Selecting the Right Dab Tools
Selecting the right dab tools is essential to enhance your dabbing experience and ensure the efficient vaporization of concentrates. In this section, we'll explore the key tools you'll need for a seamless dabbing session.
A. Dabbers
Dabbers are tools designed for handling and placing concentrates onto the hot surface of the dab nail. Choosing the right dabber is crucial for precision and ease of use.
Materials: Dabbers come in various materials, including metal, glass, and ceramic. Each material has its advantages, affecting factors such as heat retention and flavor preservation.
Style: Dabbers can have different styles of tips, such as scoops, blades, or ballpoints. The choice of style depends on personal preference and the type of concentrate you're using.
Length and Design: Consider the length and design of the dabber. A longer dabber provides more distance from the hot nail, minimizing the risk of accidental burns. The design should also be comfortable to hold and use.
Multi-Tool Dabbers: Some dabbers come with additional features, such as built-in carb caps or multiple tips. These multi-tool dabbers offer versatility and convenience.
B. Carb Caps
Carb caps are essential accessories that cover the top of the dab nail during the inhalation process. They play a crucial role in regulating airflow and controlling the vaporization temperature.
Materials: Similar to dabbers, carb caps can be made from various materials, including glass, quartz, or titanium. The material choice can affect heat retention and durability.
Style: Carb caps come in different styles, such as directional or bubble caps. Directional caps allow you to control the airflow, while bubble caps create a swirling motion, distributing heat evenly.
Compatibility: Ensure that the carb cap you choose is compatible with your dab nail. The cap should fit securely over the nail to effectively trap and control the vapor.
Dual-Purpose Caps: Some carb caps serve dual purposes, acting as both a carb cap and a dabber. These can streamline your dabbing process and reduce the need for multiple tools.
C. Dab Tool Storage
Proper storage of your dab tools is often overlooked but is crucial for maintaining their cleanliness and functionality.
Dab Mat or Container: Consider using a dab mat or a designated container to keep your dab tools clean and organized. This prevents cross-contamination and ensures that your tools are easily accessible when needed.
Cleaning Routine: Develop a regular cleaning routine for your dab tools. Clean them with isopropyl alcohol after each use to remove any residue and preserve their performance.
By carefully selecting your dabbers and carb caps and implementing a proper storage routine, you'll be well-prepared for a successful and enjoyable dabbing experience. In the next step, we'll delve into the process of preparing your concentrate for optimal vaporization.

Step 5: Preparing Your Concentrate
Preparing your concentrate is a crucial step in the dabbing process, influencing both the flavor and potency of your experience. In this section, we'll explore the types of concentrates available and provide guidance on proper handling and storage.
A. Types of Concentrates
Wax: Wax is a popular concentrate known for its creamy consistency. It's easy to handle and offers a robust flavor profile. Experiment with different wax strains to discover your preferred taste.
Shatter: Shatter has a glass-like, brittle consistency and is often transparent. It's known for its high potency and can produce a clean, flavorful vapor. Handle shatter carefully to prevent breakage.
Budder: Budder has a smooth, buttery texture and is easy to work with. It's favored for its rich flavor and is a great option for those new to dabbing concentrates.
B. Proper Handling and Storage
Use a Dab Tool: When handling concentrates, always use a dab tool. This prevents direct contact with your fingers, preserving the integrity of the concentrate and preventing contamination.
Room Temperature: Allow your concentrate to reach room temperature before dabbing. Cold concentrates can be challenging to work with and may not vaporize as efficiently.

Avoid Overhandling: While handling your concentrate, avoid overhandling or excessive agitation. This helps maintain the texture and consistency of the concentrate.
Store in a Cool, Dark Place: Proper storage is vital for preserving the potency and flavor of your concentrate. Store it in an airtight container in a cool, dark place to prevent exposure to heat and light.
Labeling: If you have multiple concentrates, consider labeling them with the strain and date of purchase. This ensures you can track the freshness and potency of each product.
C. Experimenting with Concentrates
Blend Strains: Experiment with blending different strains of concentrates to create unique flavor profiles. This allows you to tailor your dabbing experience to your preferences.
Dosage Awareness: Be mindful of your concentrate dosage. Start with a small amount, especially if you're new to dabbing, and gradually adjust based on your tolerance.
Explore Terpenes: Terpenes contribute to the aroma and flavor of concentrates. Explore concentrates with different terpene profiles to discover nuanced and enjoyable dabbing experiences.
By understanding the characteristics of different concentrates and adopting proper handling and storage practices, you'll maximize the potential of your dabbing session. In the next step, we'll guide you through the process of igniting the torch and heating the dab nail to the optimal temperature.
Step 6: Igniting the Torch
Safety Precautions
When using a torch, prioritize safety. Choose a well-ventilated area, keep flammable materials away, and follow the manufacturer's guidelines for the torch.
Heating the Dab Nail
Use the torch to heat the dab nail evenly. Wait for the nail to reach the recommended temperature, ensuring a consistent and efficient vaporization process.
Step 7: Taking the Dab
Proper Inhalation Techniques
Inhale slowly and steadily to ensure the vapor is efficiently absorbed. Experiment with different inhalation techniques to find what works best for you.
Dos and Don'ts
Avoid taking excessively large dabs, as this can lead to discomfort. Start with a small amount and gradually adjust based on your tolerance.
Step 8: Cleaning Up
Post-Dab Rig Maintenance
After each use, clean your dab rig to prevent residue buildup. Empty the water chamber and wipe down the components with isopropyl alcohol.
Storing Used Tools
Store your dab tools in a designated container to keep them clean and easily accessible for future use.
Step 9: Troubleshooting Common Issues
Burnt Taste
If you experience a burnt taste, adjust the temperature of the dab nail or consider trying a different concentrate.
Inconsistent Heating
Inconsistent heating may be caused by a dirty dab nail. Clean the nail thoroughly and ensure the torch flame is evenly distributed.
Step 10: Exploring Advanced Techniques
Low-Temperature Dabbing
Experimenting with low-temperature dabbing allows you to enjoy the full spectrum of flavors in your concentrate without harshness.
Using Quartz Inserts
Quartz inserts can enhance your dabbing experience by providing better heat retention and distribution.
Wrapping Up
Congratulations on mastering the 10 easy steps to using a dab rig! By understanding the basics, choosing the right rig, and following proper setup and handling techniques, you're well on your way to enjoying a flavorful and efficient dabbing experience.
Embrace the world of dabbing with confidence, and don't hesitate to explore advanced techniques to enhance your sessions. Remember to prioritize safety, responsible use, and regular maintenance to ensure the longevity of your dab rig and the quality of your concentrates.
FAQs
Is dabbing safer than smoking?
Dabbing is generally considered safer than smoking as it eliminates the combustion of plant material, reducing the inhalation of harmful substances. However, responsible use and adherence to safety precautions are crucial for minimizing risks.
Can I use a dab rig for dry herbs?
Dab rigs are specifically designed for concentrates. Attempting to use dry herbs may damage the rig and result in an ineffective dabbing experience. Consider using a dedicated dry herb vaporizer for herb consumption.
How often should I clean my dab rig?
Regular cleaning after each use is recommended to prevent residue buildup and maintain the rig's performance. A clean dab rig ensures a flavorful and efficient dabbing experience.
Are electronic dab rigs worth the investment?
Electronic dab rigs, or e-rigs, offer convenience and portability, making them worth the investment for users who prioritize these features. Consider factors such as battery life, temperature control, and ease of use when choosing an e-rig.
What is the ideal temperature for dabbing?
The ideal dabbing temperature varies depending on the concentrate. Experiment with different temperatures to find your preferred dabbing experience. Lower temperatures may preserve terpenes and offer a more flavorful vapor, while higher temperatures can provide stronger effects.

