
Recent Posts
7 Ways To Enjoy Cannabis Without Smoking
Published on May 19, 2024
11 Best Smoking Accessories of 2024
Published on May 19, 2024
9 Most Colorful Bong for Buy
Published on May 19, 2024
Do You Put Water In A Dab Rig
Published on May 12, 2024
How To Clean Silicone Bubbler Water Pipe
Published on May 12, 2024
How To Use A Water Pipe Bubbler
Published on May 11, 2024
BEST SELLING
4" -(12 per pack) Blue dot head Pyrex Glass Oil Burner Pipe


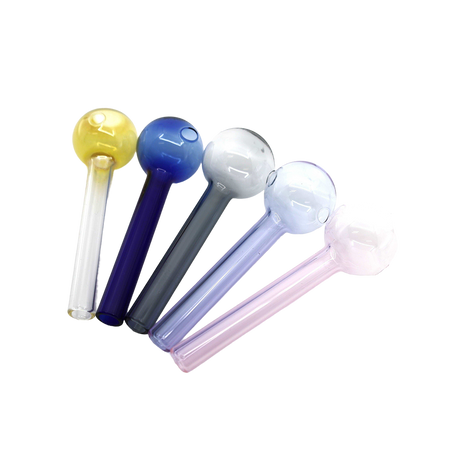
4-inch (12 pcs pack ) Colorful Pyrex Glass Thick Oil Burner Pipe
7 Steps How To Use E-Nails For Dabbing

CP SMOKE MEGA |
Using e-nails can completely change the dabbing experience. It may surprise you to learn that e-nails offer accurate temperature control, doing away with the need for butane torches and guaranteeing a reliable and pleasurable dabbing experience. With their user-friendly features and simple technology, e-nails have swiftly gained popularity among dabbing lovers.
What are E-Nails for Dabbing?
E-Nails, also known as electronic nails, are innovative devices that have revolutionized the process of dabbing. Dabbing is a method of consuming concentrated cannabis extracts, known as dabs, which are vaporized and inhaled for their potent effects. Traditionally, dabbing required the use of a blowtorch and a rig setup, which could be intimidating and potentially dangerous for inexperienced users.

E-Nails provide a safer and more convenient alternative for individuals who enjoy dabbing regularly. They are composed of a temperature-controlled electronic controller and a heating element, typically made of titanium or quartz. E-Nails offer precise temperature control and eliminate the need for a blowtorch, making the dabbing process more accessible and easier to manage.
Step 1: Set up Your E-Nail
The first step to using an E-Nail for dabbing is setting up the device properly. Here are the key aspects to consider:
- Choose a stable and heat-resistant surface for your E-Nail setup.
- Connect the power cord to the E-Nail controller and plug it into a safe and grounded electrical outlet.
- Attach the heating element, whether it's a titanium or quartz nail, to the E-Nail coil.
- Secure the nail to the dab rig using the appropriate connector or adapter.
- Ensure that all connections are secure and tightened.
Once your E-Nail is properly set up, you can move on to the next step.
Step 2: Adjust the Temperature
Temperature control is a crucial aspect of using an E-Nail for dabbing. Unlike traditional dabbing methods that rely on a blowtorch's inconsistent heat, E-Nails allow you to set and maintain a precise temperature throughout your dabbing session. Here's how you can adjust the temperature:
- Power on your E-Nail controller and navigate to the temperature setting option.
- Use the up and down buttons to select your desired temperature. The recommended temperature for dabbing is typically between 300°F and 450°F (149°C and 232°C).
- Allow the E-Nail to heat up to the desired temperature. Most E-Nails have an indicator that shows when the set temperature has been reached.
Keep in mind that different concentrates may require different temperatures for optimal vaporization, so be sure to experiment and find your preferred temperature for each type.
Step 3: Preparing and Placing the Dab
Before you start dabbing, you need to prepare your dab and place it on the heated nail. Here's how:
- Using a dab tool or dabber, scoop a small amount of concentrate, such as wax or shatter.
- Ensure the dab tool is clean and free from any residue.
- Gently touch the heated nail or insert the tool into the nail, allowing the concentrate to melt and vaporize.
- Be mindful not to touch the hot nail directly with your fingers to avoid burns.
Make sure to place the dab on the nail's center for even vaporization and maximum flavor.
Step 4: Inhale and Enjoy
Now that your dab is placed on the heated nail, it's time to inhale and enjoy the flavorful vapor. Here's how:
- Position your mouth at the mouthpiece of the dab rig.
- Gently inhale while covering the carb cap, if applicable, to control the airflow and enhance vaporization.
- Breathe in slowly but steadily, allowing the vapor to fill your lungs.
- Exhale slowly and enjoy the effects of your dab.
Remember to start with a small dab and gradually increase the amount as you become more comfortable with the process.
Step 5: Maintain and Clean Your E-Nail
To ensure the longevity and optimal performance of your E-Nail, regular maintenance and cleaning are essential. Here are some tips to maintain your E-Nail:
- Wipe down the E-Nail controller and coil with a damp cloth to remove any residual concentrate.
- Avoid using harsh cleaning agents or abrasive materials that could damage the device.
- Clean the nail regularly with a cotton swab or pipe cleaner after each dabbing session.
Regular cleaning helps prevent residue buildup and ensures consistent heating and vapor quality.
Step 6: Experiment with Different Dabbing Techniques
Once you feel comfortable with the basic E-Nail dabbing process, you can explore and experiment with various dabbing techniques to enhance your experience. Here are a few popular techniques:
- Low-Temperature Dabbing: Lowering the temperature allows for a smoother and more flavorful vapor.
- Cold-Start Dabbing: This technique involves placing the concentrate on the nail before heating it, resulting in a different flavor profile.
- Dab Carb Caps: Carb caps help control airflow and retain heat, optimizing the vaporization process.
- Directional Carb Capping: By manipulating the carb cap's position, you can direct the airflow and create different vapor profiles.
Exploring these techniques can add variety and depth to your dabbing sessions.

Step 7: Safety Precautions
While using E-Nails for dabbing offers a safer alternative to traditional methods, it's essential to follow these safety precautions:
- Always use caution around hot surfaces, including the nail and rig.
- Keep the E-Nail away from flammable materials.
- Ensure the E-Nail is placed on a stable surface to avoid accidents and spills.
- When not in use, unplug the E-Nail and store it in a cool and dry place.
By following these safety guidelines, you can enjoy the benefits of dabbing without compromising your well-being.
Using E-Nails for dabbing provides a convenient and precise way to enjoy the benefits of concentrated cannabis extracts. With the right setup, temperature control, and technique, you can experience flavorful and potent vapor with each dab. Remember to prioritize safety, experiment with different techniques, and maintain your E-Nail to ensure a satisfying and enjoyable dabbing experience.
Key Takeaways:
- Step 1: Choose a suitable e-nail with temperature control.
- Step 2: Connect the e-nail to a compatible dab rig or water pipe.
- Step 3: Power on the e-nail and set the desired temperature for dabbing.
- Step 4: Wait for the e-nail to reach the set temperature.
- Step 5: Apply the dab concentrate onto a dabber tool.
Frequently Asked Questions
Here are some commonly asked questions about using E-Nails for dabbing:
1. How do I set up an E-Nail for dabbing?
To set up an E-Nail for dabbing, first, make sure you have a compatible E-Nail unit and a dab rig. Connect the E-Nail controller to a power source and attach the heating coil to the nail on your dab rig. Set the desired temperature on the E-Nail controller and wait for it to heat up. Once the temperature is reached, the E-Nail is ready for dabbing. Remember to handle the hot nail and heating coil with caution.
2. What is the optimal temperature for dabbing with an E-Nail?
The optimal temperature for dabbing with an E-Nail varies depending on personal preference and the type of concentrate used. Generally, temperatures between 315-450°F (157-232°C) are recommended. Lower temperatures around 315-350°F (157-177°C) produce smoother and more flavorful hits, while higher temperatures around 400-450°F (204-232°C) result in bigger and denser vapor clouds. Experimenting with different temperatures will help you find your ideal dabbing experience.
3. How do I take a dab with an E-Nail?
To take a dab with an E-Nail, follow these steps:
Step 1: Ensure the E-Nail and dab rig are properly set up.
Step 2: Prepare your dab by placing a small amount of concentrate on the nail of the dab rig.
Step 3: Activate the E-Nail and set the desired temperature.
Step 4: Once the E-Nail reaches the desired temperature, use a dabber tool to touch the concentrate onto the hot nail, allowing it to vaporize.
Step 5: Inhale the vapor through the mouthpiece of the dab rig, ensuring a steady and controlled inhalation.
Step 6: Exhale slowly and enjoy the effects of your dab.
4. How do I clean an E-Nail after dabbing?
Cleaning an E-Nail after dabbing is important to ensure its longevity and optimal performance. Here's how to clean an E-Nail:
Step 1: Allow the E-Nail to cool down completely before cleaning.
Step 2: Remove the heating coil from the nail and wipe off any residual concentrate with a cotton swab or alcohol wipe.
Step 3: Use a cleaning solution specifically designed for dab rigs to clean the nail thoroughly. Soak the nail in the solution and scrub it gently with a cleaning brush or pipe cleaner.
Step 4: Rinse the nail with warm water and dry it completely before reattaching the heating coil.
Step 5: Regularly clean and maintain other components of your dab rig, such as the glass piece and dabber tool, to ensure a clean and enjoyable dabbing experience.
5. Are there any safety precautions I should take when using an E-Nail for dabbing?
Yes, there are safety precautions to consider when using an E-Nail for dabbing:
- Always handle the E-Nail, heating coil, and hot nail with caution to avoid burns.
- Do not touch the heating coil or nail when they are hot. Allow them to cool down completely before handling.
- Use the E-Nail on a stable and heat-resistant surface to prevent accidents.
- Properly set up and connect the E-Nail unit and heating coil to ensure safe operation.
- Follow the manufacturer's instructions and guidelines for the specific E-Nail model you are using.
- Keep the E-Nail away from flammable materials and ensure proper ventilation in the dabbing area.
Ending Note:
To conclude, using e-nails for dabbing can be a convenient and efficient method for enjoying your concentration. By following these seven steps, you can ensure a smooth and enjoyable dabbing experience.
Remember to prepare your e-nail properly by cleaning it regularly and setting it to the appropriate temperature. Use a dab tool to place your concentrate on the heated nail and inhale slowly for maximum flavor and effect. Lastly, always prioritize safety by using a reliable e-nail and practicing caution when handling hot surfaces. With these steps in mind, you'll be able to dive into the world of dabbing with confidence and ease!


